

wildcat junkie
-
Posts
3079 -
Joined
-
Last visited
-
Days Won
8
Content Type
Profiles
Forums
Hunting New York - NY Hunting, Deer, Bow Hunting, Fishing, Trapping, Predator News and Forums
Media Demo
Links
Calendar
Store
Everything posted by wildcat junkie
-
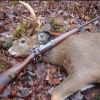
I once tried to "bark" a squirrel on the side of a hickory trunk with my .36 flintlock. I knocked the squirrel down but when I got to it, it had revived & was getting to its feet. Knowing better than to grab the critter with my bare hands, I used the crescent steel buttplate to pin it to the ground. The little bastard turned & started gnawing on the buttplate making a sound that sent chills up my spine. And yeah, awesome picture.
-
I just noticed that it has the "wide duplex" I think the duplex gap subtends 15" at 100yds.
-
You can use the duplex gap to estimate animal size (if you know the range) and also as a secondary aim point. The typical Leupold duplex subtends 5" at 100yds. The top of the gap will be 2 1/2" high at 100yds and is a good value to sight in with. The bottom of the gap will be 7 1'2low at 300yds, 10" at 400yds, etc. I would rather have friction adjustment than 1/2 MOA clicks. The turrets are probably like the old Vari-X II scopes and are marked at 1/2 MOA. If you pay close attention as you adjust you can get extremely fine adjustment.
-
 Yeah, and the elk dropped in it's tracks. Maybe it was a spine hit.
 -
"Big Foster" was hunting that had a sporterized 30/40 Krag with a (no drill) Redfield 102 Krag peep sight. It mounts through the same hole as the magazine side plate. I couldn't believe my eyes when he shouldered the rifle and it was clearly a Krag. Even from the left side they are easily identified. I noticed what sight it had when I paused it (DVR) for a closer inspection. Kodos for the producers of "Outsiders" for choosing something unusual yet appropriate. Unfortunately for Big Foster, the old Krag misfired when he tried to take a shot at an Elk. Probably old turn of the century ammo.
-
I used to fire up to 20 shots on the completion line using a spit (or other water based lube) patch and 60gr of GOEX fffG black powder.That was either in my percussion or flintlock mountain rifle. As you pointed out, when the mark on the ramrod got to about 1/4" from the muzzle, the breech would be cleaned. No removable breech plug either. A breech plug scraper would be employed to clean the face of the breech plug.
-
What does anyone think about a 10 gauge
wildcat junkie replied to Al Bundy's topic in Guns and Rifles and Discussions
Is it designed to shoot steel shot? Most old fixed choke barrels are not. -
What does anyone think about a 10 gauge
wildcat junkie replied to Al Bundy's topic in Guns and Rifles and Discussions
Comparing a 3 1/2" 12ga shooting the same payload as a 3 1/2" 10ga is somewhat similar to comparing a 1 1/4oz load from a 2 34" 12 ga to a 1 1/4oz load from a 3" 20 ga. In each instance the larger ga will have a shorter shot column. The added advantage of the 10ga compared to the 12 ga with the same length and payload is that the 10 ga has more room for WAD column and will have less perceived recoil and less shot deformation due to added cushion.The later is not so critical with steel shot, but is is a factor with lead. -
What does anyone think about a 10 gauge
wildcat junkie replied to Al Bundy's topic in Guns and Rifles and Discussions
The laws of physics as they apply to internal ballistics make it IMPOSSIBLE for a 3 1/2" 12 gauge to equal the performance of a 10 gauge at the same pressure. The 10ga will also deliver the same shot payload in a shorter shot column than a 12 ga. That gives the 10ga the advantage in external ballisics. -
For those of you following this thread, I have posted a TRIGGER TUNE-UP THREAD.
-
CZ 452 American Trigger Tune-Up
wildcat junkie replied to wildcat junkie's topic in Guns and Rifles and Discussions
Trigger tuning part deux. In some earlier posts a few folks mentioned using a stone on the sear engagement surfaces. Working on these surfaces is a whole nuther ball of wax. It requires a different type of stone and a different set of talents and mindset. After those posts aroused my curiosity, and I had the trigger apart for pictures anyway, I rummaged around in my tool drawer and found one of my sear stones from my muzzleloader and revolver shooting days. I used to have 2 different stones, the triangle type pictured below and a blade type which I seldom used. The last time I used this stone was when I did a trigger job on my Remington 591M 5mm CF conversion. I made a few very light passes on the sear engagement surface of the trigger pointed out by the green arrow in the picture below. This put the finishing touch on my trigger job. It actually raised the pull weight by a few oz, but now the 10oz pull breaks like glass and it will pass a pretty significant bump test. -
Yesterday I tried the "POOR MAN'S CZ 452 TRIGGER JOB" along with the ACE #144 spring swap. Neither came out to suit me. On the trigger shim I had issues with getting the precise effective shim thickness. Soldering proved to be unpractical as the sear mass sapped heat too fast to allow good flow with a soldering gun. Since using a torch, even my mini butane pencil torch, would be fraught with the danger of softening the sear. I abandoned that method. I also tried epoxy, then CA but the thickness of the adhesives yielded too little/inconsistent sear engagement. Trying to file the brass shim surface to increase sear engagement ended up dislodging the shim with either adhesive.:rolleyes: The ACE #144 spring was somewhat successful yielding a 24oz trigger pull with the nut screwed all the way back. The problem was that screwing the nut down didn't make a significant increase in trigger pull weight. This morning I started from square one. First I went with the OEM spring length reduction as outlined in the PMTJ. I was shooting for 20mm (.788") but I ended up with a spring length of 19mm (.750"). Since I had opted to keep the tension adjusting nut on the spring, that worked out quite well. I ended up with a trigger pull of 8oz with the minimum tension setting. By screwing the nut all the way down, I could increase the trigger pull to 30oz.:bthumb: EDIT: IF YOU ARE NOT FAMILIAR OR COMFORTABLE WITH THE FOLLOWING TYPE OF WORK, HAVE SOMEONE THAT IS PERFORM THIS OPERATION! Next, I went about reducing the sear engagement the old fashioned way, using a stone to reduce the sear engagement. Having quite a bit of experience at this sort of thing, I was confident that I could accomplish the results I wanted. If I went a bit too far, the engagement could be increased by stoning the small teat that rests on the sear behind the actual engagement surface. Be aware that at no time did I make ANY contact with the actual engagement surfaces in any way. I used the edge of a large sharpening stone with good square edges to stone the non engagement surface of the trigger to reduce the sear engagement. The stirrup that houses the front pin is handy for keeping the surface being reduced square with the stone. Note that the pad behind the sear engagement surface is not in contact with the stone. If you reduce this surface, you will INCREASE the sear engagment. This was a "try and fit" method and it took me about 3 cycles to get the engagement where I could not feel any significant creep. I can see some gap between the sear and the pad behind the engagement notch when the striker is down, but I do not have feller gauges narrow enough to insert into the small width of the opening. If anything, it is more than needed for safety. This gap represents the amount of sear engagement. This is the relationship of the trigger/sear when the striker is cocked. Note that the sear is now resting directly on the pad behind the sear engagement surfaces. I monitored the reduction process by using a fine cut-off disc on my Dremel Tool to make a small nick on the (non-engagement) corner of the edge I was working on. I ended up just removing the last bit of the nick on my final passes. If you look just above the RED arrow, you can barely see the last vestige of the nick remaining. The GREEN arrow is pointing to the actual surface on the rear that engages the sear. Do not attempt to use a stone to alter this surface. (I will cover this later) When I was done, I did the 12" drop test of the buttstock onto a well padded carpeted surface and the 30oz setting passed. When doing any drop test, make sure your action screws are torqued sufficiently and control the rifle to assure that the toe of the stock does not hit the surface. That can split your stock.The 8oz setting would only pass about 4" drop, but it wasn't so "hairy" that it would be dangerous for bench shooting. At the 30oz setting, the trigger "broke like glass". On the 8oz setting I could barely feel a slight amount of creep due to the light engagement, but the trigger broke immediately when I felt the movement. I want to secure (solder) the rear action screw boss that is dovetailed into the rear tang to make R&R'ing the stock easier. That will be a project for later when I pillar/bed the action. Torx head action screws with a torque measuring screwdriver will make adjusting the trigger before and after a bench session practical and bedding pressure consistent. On another note; My Weaver Classic V-24 is on a UPS truck in NY State and should be here tomorrow.:D It won't be long now!:snipersmi Trigger tuning part deux in next post.
-
Anyone shoot .204 Ruger off the shelf ammo?
wildcat junkie replied to goosifer's topic in Guns and Rifles and Discussions
There are a few that will ship to your FFL. Ammo falls under similar guidelines as firearms. Many online retailers won't support us, but there are some that will ship to your FFL. Bud's Gun Guns Shop and Champion's Choice to name 2. -
It is primarily made for use in a rotating tumbler and probably works best as such. However, PEOPLE ARE USING IT IN VIBRATORY TUMBLERS. so I'm going to look into it. I hate the fact that corn cob packs up into the primer pockets and interior and sometimes I have to pick it out of some of the primer pockets after I use my rotating separator. Even when it doesn't, the primer pockets and interior of the case do not get clean.
-
Something that has never happened with my flintlock while hunting.
-
WOW, that even cleans the inside! I got a Central Machinery (Harbor Freight) replacement for my old vibratory Midway tumbler that has served one for ovor 15 years before it went belly up. It uses the same bowls as my old one. I've only used corn cob or walnut shell for media. Either just packs up inside and doesn't clean the interior. I may have to look into your SS/wet media.
-
Laminate is more stable too., but it ain't as purdy.
-
Mine came with the metal magazine. The 10 round magazine definitely spoils the appearance. i don't anticipate having to ward off a herd of carnivorous gray squirrels so I think 5 rounds will suffice.
-
There is a mod called "The Poor Man's Trigger Mod". It entails a #144 spring from Ace hardwrae and trying various shims under the sear to reduce sear engagement. I took the 452 apart to check out the trigger for the poor man's mod. My feeler gauges were too wide to get a precise measurement, but by using a corner, I got about .010" clearance with the striker down. I have some .005" brass sheet and some Stay Brite silver solder that melts @ 400*F so I'll go that route. I slide some.005" shim under the sear and the trigger had no perceptible creep. If there is too little sear engagement, I can slide a one sided jeweler's file in and reduce the brass thickness some if needed. While I had it apart, I did some tests on concealed surfaces to check out the bluing. The Huglu (Turkish) made CZ double barrel shotguns have black chrome instead of oxide bluing. I was pretty sure the 452 had oxide blue but wanted to make sure. I used a swab to dab a bit of "Rust and Blue Remover" and it did remove the bluing. That will leave me the option of doing a rust blue to match the Weaver Classic V-24 scope if I decide to.. I tried to get some better pictures this morning but I still didn't have the right lighting. I had to use flash and there's some glare. I mounted the Leupold VX-II from my 5mm CF. The Leupold rimfire rings from the early '70s seemed to fit just fine and the screw slots on the clamps even ended up being "clocked" fairly close to 12:00 like they were on the 591M receiver. I think she might be a "keeper" so I'll take her home to meet my parents.
-
Trouble shooting my 30-06. 308 less kick?
wildcat junkie replied to Al Bundy's topic in Guns and Rifles and Discussions
Pachmayr Decelerator is a good one too. -
Well, I'm hankerin' to get into the monthly 100yd Benchrest Challenge over on Rimfire Central Forums & that takes some serious shooting. The trigger is about right for poundage at 3#, but there's about 9 yards of creep so I'll be doing some tuning. The poor man's trigger job just consists of an Ace Hardware #144 spring and some shim epoxied under the sear. The pillar and gals bedding won't be all that big of a deal. The 452 is supposed to respond well to that. The barrel channel has some issues as it is and need a bit of attention. I just picked it up today & won't be getting the glass mounted until the end of the month for $$$$ considerations.
-
OK a little data on the rifle. CZ 452 American 22lr Turkish walnut stock 22 1/2" barrel 5.9# 5 round detachable box magazine 2 position striker lock safety I will be mounting a Weaver Classic V-24 6-24x42 scope with a "Varminter" reticle and adjustable objective lens using Burris 420069 rimfire rings. Planned modifications; Pillar bedding using .38" threaded lamp pipe, Glas bed the action and 3" of the barrel ahead of the receiver, free float the remainder of the barrel Trigger tuning via "poor man's (CZ 452) trigger mod" Diversified Innovative Products CNC steel trigger Guard/bottom metal (OEM top, DIP bottom) Strip gloss blue & rust blue for a satin finish Over the summer, while riding my bicycle, I stumbled onto an widespread area that looked like excellent squirrel hunting with diversified nut and mast tree species. I returned later via car & saw several gray squirrels while driving on rural roads in the area. There is a large tract of state land in the area. The rifle will serve double duty as a squirrel sniper rifle and a sporter-weight bench rest rifle.
-
Trouble shooting my 30-06. 308 less kick?
wildcat junkie replied to Al Bundy's topic in Guns and Rifles and Discussions
7mm-08, 7X57 Mauser, 260 Remington, 6.5X55, 257 Roberts -
Leupold VX-2 3-9X40 with a simple duplex reticle is all the scope most anyone would need.
